Sunday, February 3, 2013

Block Three - Jelly Roll Sampler Quilt

Well, I've finished Block Three of the first Jelly Roll Sampler quilts.  Three more classes and nine more blocks to go.

I learned a couple of things "over again" on the first block.  Do NOT use two different rulers to make your cuts.  Especially when you are cutting from strips, the pieces are so small that any deviation at all will play havoc with the finished product.  When I was at the Stripping class, I forgot/couldn't find my triangle ruler, and so Karen showed me how to use my 6" square ruler to cut triangles from my strips.  Then halfway through the class, I discovered that I had not cut enough triangles, and borrowed Lisa's triangle ruler.  Naturally nothing fit because my triangle ruler cuts were more precise than my block ruler cuts.  I found this out last weekend when I was trying to put block one together.  Bummer!  I had to cut new triangle segments to get the blasted thing put together.  And wouldn't you know it, my triangle ruler was in my sewing tote all along!

The next thing that I learned was that whatever ruler I was using tended to slip as I was cutting from the strips.  This was on Block Two.  So before I began cutting Block Three, I remembered that sometime last year I purchased a roll of InvisiGrip, made by OmniGrid.  But where in the world did I put it and would I be able to actually find it without completely tearing my sewing room apart?  Only a search and destroy would tell!  So I searched.  Didn't find it.  Took a frustration break, then went back into the sewing room and Lo and Behold, opened a drawer and there it was!  Now I can't even remember where I found it.  Actually followed the directions and put that clingy stuff on the back of my Fons and Porter Half & Quarter Ruler and my 6" Creative Grids square ruler before I made ANY cuts.  Guess what?!?  It actually DID help my rulers from slipping!  Still have to be careful, of course, but it did help.

Next, I needed to choose three colors from my Double Chocolate jelly roll.  Got a tad frustrated there because one of the colors needed two strips and there aren't any doubles in the roll that I can see.  So I chose a fourth strip that coordinated.  Yipee!  On to cutting!

Got all of my pieces cut and then discovered that I mistakenly put the wrong strips together to cut my triangles.  Where I was supposed to be using brown, per my strip choices, I used blue.  And where I was supposed to be using blue, now had to use brown.  Ok.  We can make that work, as Tim Gunn says. 

I didn't take any pictures of my triangle chain piecing, but here is a picture of the center of the block:


 You can see the fabric substitutions in the rectangle pieces and the beige triangle pieces.  In a perfect world, I would have had two strips of the triangle fabric.  Now it should also be said that I got in a hurry and forgot to look at the diagram for putting this block together, and so had to improvise yet again!  The block should have been put together in rows, rather than building from the center out.  Maybe I was a little dyslexic yesterday!  But I forged on and made it work!

Here are portions of the side rows and a completed top row:


Again, I got a little ahead of myself and pressed the side units before I got through with them and matched them up to the center square, so I had to unpress and set the seams in the opposite direction so that I could lock seams.  You can see here that I haven't yet pressed the top row.  Usually what I do is put the units together on the ironing board so that I can look at what I'm attaching to and iron appropriately.  I'm not sure how others do this, but this method works for me - yes, when I remember!  I also ironed the seams open on all of my triangle units because my Marie hates bulky seams and I thought this would help me put everything together (lesson learned from block 1!).
For part of this block, I cheated and used glue to make my seams stay put when going under the needle.  This method of using Elmer's School Glue has really helped me in getting my seams to match and not shift while I'm sewing.  BUT...I do feel like I'm cheating, because I'm not really learning how to get matched seams all on my own.  Last night, after the great Marshall Chili Fest, I watched one of my Craftsy courses, the 2013 Mystery Quilt, and the instructor showed how she locks her seams together and then pins on both sides.  So this morning I decided to give that a try on the final two rows of this block.  It worked!  It took a lot less time than locking the seam, adding a dot of glue, ironing it to dry the glue, and moving on to the next seam, and repeating, before sewing.  I also used another tip that I learned from My Civil War Block Craftsy course, because I discovered that the center triangle units had just a little more fabric than the rectangle unit.  There I learned to place the strip with the extra fabric on the bottom when putting it through the machine, to let the feed dogs do the work of making everything fit.  It also worked.
So all in all, I'm pleased with the end result of this block.  Considering all the blunders I made in cutting, it turned out ok.  Nine more blocks to go.  Maybe this will become Jordan's bed quilt since he's moving and needs blankets.

Now...what to sew for the rest of the day?  Well, I could work on quilting my New York Roundabout wallhanging, work on January and February's Craftsy Mystery Blocks, or start something new!  Decisions, decisions!  LOL!  It will keep my mind off Jordan's impending departure.  I've already cried buckets.  Can I have a do-over on raising my kids?  Please?


Saturday, February 2, 2013

Snowy Saturday Musings

Here it is, the year 2013, and I've been REALLY bad about blogging ever since I started this blog.  Because it's February 2, I can't even pretend that I made a New Year's resolution to be more dedicated about posting here!  Ha! 

So what have I been doing all these months that I haven't been blogging?  Well - work, of course - and sewing pretty much every Saturday, or visiting my LQS.  Bless My Stitches did a Block of the Month last year and I've actually got all of the blocks done, but haven't yet cut out the setting pieces.  Need to get on that - if the top turns out well, I plan to put it on our bed as a comforter.  I've made some wallhangings, put together another top that I pieced during the end of 2011 and beginning of 2012, made some purses, and actually finished lap quilt for my son and gave it to him right before New Year's.

Today I'm working on blocks for a Second Saturday Strip class and watching Foyle's War on Netflicks.  I've discovered that I really like British tv series shows and especially like the cop shows.  Foyle's War is set during World War Two. 

The blocks that I'm working on for the Strip Club are from a book called Jelly Roll Sampler Quilts by Pam and Nicky Lintott.  There are some very pretty quilts that can be made from this book.  Still can't decide whether or not I like working with precut strips though.  But I'm learning quite a bit and that's a good thing.  While I was pressing some of my triangle units, the thought struck me that this would be a great time to start charting my progress via this blog.  IF I remember to keep it up, huh?

I'm also a little bit in mourning.  Our son will be moving to Athens tomorrow.  He graduated from college December 2011, so I suppose that it really is time for him to move out and begin his adult journey, but it's also very sad to me that he won't be here at home.  I'm going to miss him so bad that I don't know if my heart can stand it.  He's the last little birdie to leave the nest.  Our daughter got married two years ago.  Now it will just be me, hubby, and the doggies.

Speaking of doggies, we have managed to inherit a Great Dane from our son's best friend, who has also moved to Athens.  Her name is Lacy.  It didn't take very long for me to get attached to this huge, slobbery, boisterous dog.  She has claimed me as her person and I'm trying, without much success, to teach her some manners.  Most mornings I get to work with paw prints between my shoulder blades and doggie spit all over my chest.  But I suppose that's half the fun of belonging to a Great Dane!

Here is the book that the Stripping Club is working from, and pictures of the first two blocks that I've made from it.  I'm a little dissatisfied with the first block and may sew a do-over after I finish the rest of the blocks.  The second block turned out a little better.     


Block One - it is actually MUCH more square than it looks in this picture - I take crappy photos

Block Two went together easier - I pressed the triangle square seams open - may do this for each block

Here is the beginning of Block Three.  There are some more pieces but I haven't started putting it all together yet.  Just finished pressing seams open on no less that 20 - yes, that's right, 20 - triangle units.  That's when I decided I needed to take a break and blog!  LOL

Today is a REALLY good day to have a neat hobby!  Here's what it looks like at my house at about 4:15 - it's been doing this for a while, I guess.  I didn't really realize that it was snowing until about 2pm when I came out of the sewing room for a cup of Java.

The picture above is two hours more snow than what I saw when I went into the kitchen for that cuppa Joe.  Boy, was I surprised!
 
And this is the view from my front porch looking down the pasture.  I just love snow, especially if the power stays on!  If the power goes off, I like it for about a day and then I'm ready for it to disappear.  Ha!
 
Hubby has made it back across the mountain from Cleveland so I'm relieved, but won't totally relax until he pulls into the driveway.  Driving in this can be SO dangerous.  The mountain was closed to traffic when he first got into Helen, due to a wreck.  I'm glad that he called to let me know he was on this side and safe!  He's going to try to go to the store for the makings of chili - that seems very suitable for a snowy Saturday, doesn't it?  Yum!  I'm hungry just thinking about it.  Oh Wait!  I'm hungry because I lost track of time in the sewing zone!

Saturday, July 7, 2012

My Latest Craftsy Course

Recently I took a Craftsy.com course called Stitch and Slash, taught by Carol Ann Waugh.  The technique of stitching and slashing involves stitching four layers of fabric together in patterns, then tearing away various widths of the layers.  I'm not explaining it too well, but it was fun!  Once you get all of your layers slashed, then you go back and play by adding yarn and decorative stitching.  I had a lot of fun with this project and really like Carol's motto - "There are no mistakes!" 

So I won't tell you how many times that I managed to sew my free-motion foot to layers of the project, because - oh yeah - there are no mistakes!

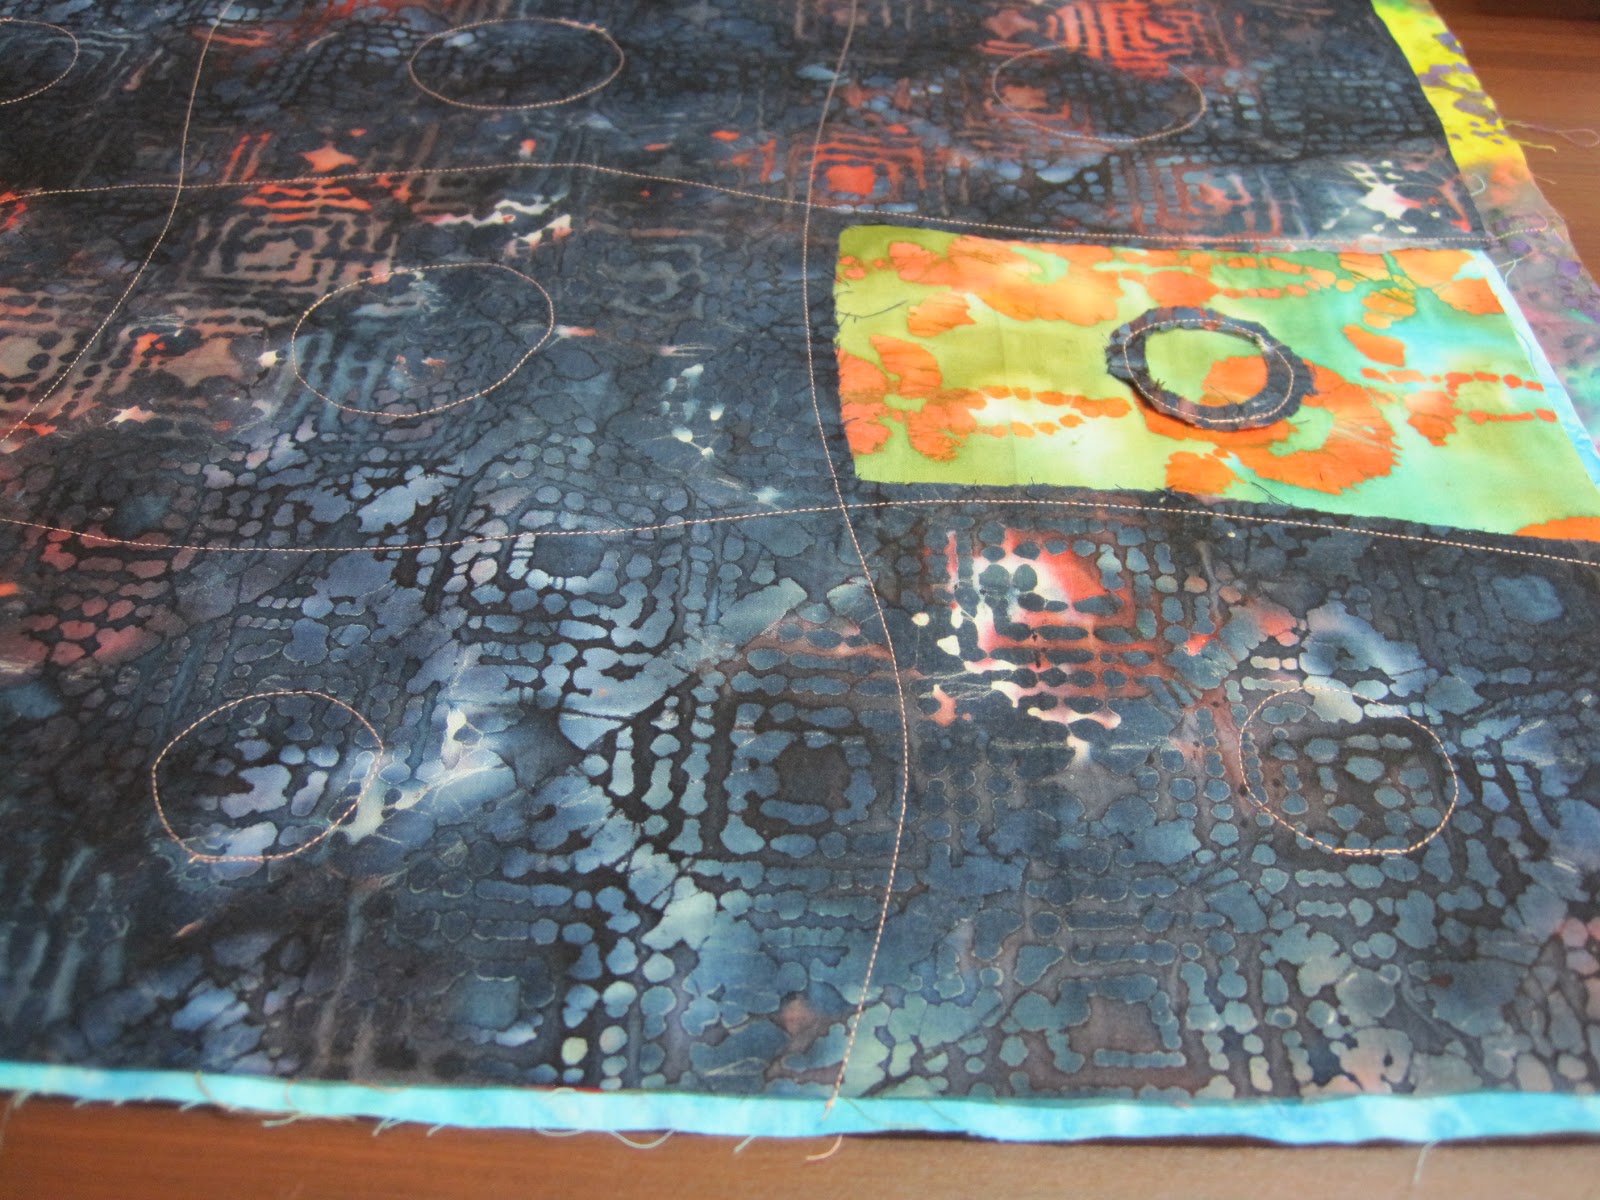
Now, because I took the process challenge, I've actually got a picture of the unfinished piece, as I was beginning the process of slashing away the layers.  In this picture, you can see the front of the project, with the lines stitched down.  I used four batik fat quarters.  And I've slashed away the first layer of fabric in one section.


And here is a closer shot...


I did lots and lots of slashing.  And naturally forgot to take more pictures.  BUT...once I got through with all the slashing, the next thing was to add yarn over my stitching lines, and then add some decorative stitching around the circles.  Once that was done, it was time to make the quilt sandwich, and do some stitching underneath the slashed areas.  Then I added some free-motion loopty loops (some of which are not very good at all), and then bound the piece with yarn.  Ta Da!  It's actually finished, although I might still add some beads.  This was a fun project and turned out better than I thought that it would, especially since I was using some really cheap fabric. 


Sunday, June 24, 2012

Civil War Blocks - A Craftsy Course

So...I've taken the Process Pledge and I am going to apply it to the blocks that I produce from my Civil War Blocks Craftsy course.  If you have never signed up for a Craftsy course, let me tell you - they are Tons of fun! 

Anyway...Kaye England is teaching a Civil War Block course that will yield 12 blocks, a plan very similar to the Block of the Month that I participate in at Bless My Stitches Quilt Shop.  The price was right, and I thought it would be fun, so I signed up for it.

The first block that Kaye has us make is the Remember Me block.  It's a two color, basic block.  So I'm thinking, yeah, I can probably do this, seeing as how I jumped into quilting learning to do more advanced blocks (the jury is still out on whether or not I've mastered THOSE techniques!  LOL)  Anyway, she recommends using some rulers that I discovered she designed.  I checked them out on the web and they do look to be interesting and useful, so I might splurge and purchase a couple of them.  When she demos them during the course, it does appear to make cutting much easier.

Kaye uses a method in her piecing that is new to me.  She doesn't iron between each stage of piecing!  Yes, you heard me.  She doesn't iron until the block is complete!  This is SO foreign to anything that I've learned so far in my quilting journey.  But I decided that I would try her method for the entirety of the course, to see if it actually helps my blocks be more precise.

Using this method on the Remember Me block, I felt like everything was out of control.  But, wonder of wonders, my seams did pretty much line up - usually my Seam Ripper is my best friend!  It just felt really weird, though.  I finger pressed, like she did in the video, so my pieces were basically flat, but it just wasn't as crisp as when you press. 

Since I hadn't heard of the Process Challenge when I started this journey, I don't have step by step pictures, but I can show you my finished blocks.  I made two of the Remember Me just to see if the process felt better to me with practice.  The second block does not have the border on it, but you can still see that everything went together pretty well.  Now in the first block, there is a mistake that I will need to correct.  Didn't see that until I had it up on the design board for picture-taking.  LOL!  You'll have to see if you can find it.  When I did, I wondered why in the world I hadn't noticed it before! 

So...here are my first no-press results:


Interesting Challenge

Today as I was browsing the web, I ran across an quilting page that had an interesting challenge - one that challenges quilters to document the "process" of quilting rather than simply posting the finished product.  That seems to be to be a Great learning tool for quilters to come, so I decided to make the pledge!  It's timely, too, because I recently signed up for a Craftsy.com course with Kay England, to make Civil War blocks.

So...now if I can figure out in this new editor, just how to add the pledge button, I'll be all set.  THEN it's simply a matter of remembering to document my progress.  Ha!